Submit your email address to get a link for quick download on your desktop and get started!
Enabling VirtualBox USB passthrough functionality lets users in a VBox guest VM easily transfer data to USB peripherals. We are going to show you how to enable the USB in VirtualBox feature so you can use local USB devices in a VM with the same functionality of a direct connection. We’ll also talk about how to facilitate USB in VirtualBox with different operating systems. Additionally, we offer you to try the VBox USB passthrough feature with the help of USB Network Gate and work with your devices in any environment.
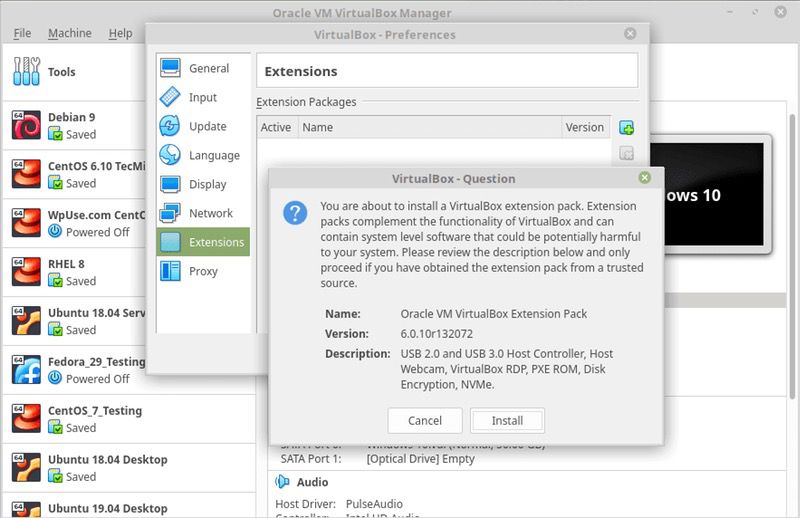
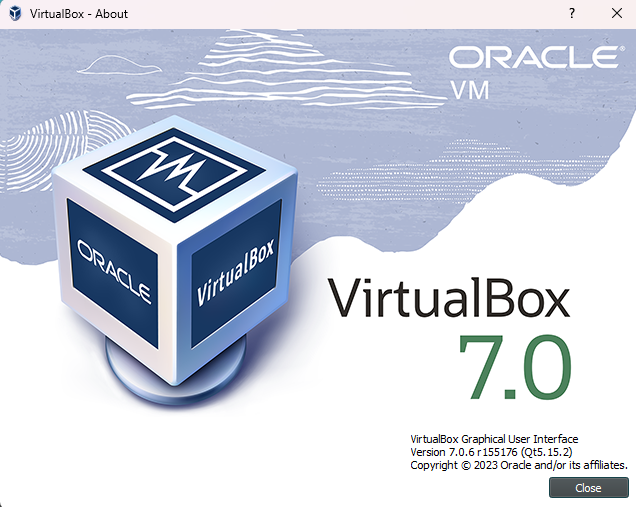
An additional package, the VirtualBox Extension Pack, is required when implementing VirtualBox USB passthrough. Since the 6.1. or older versions of VirtualBox are no longer supported, you are recommended to install the latest version - VirtualBox 7.0 and the extension pack accordingly. This package interacts with the USB controllers and is not included in a base VirtualBox installation. Once you install the extension pack for VirtualBox 7.0, you should have no trouble using your USB devices in a VirtualBox VM.

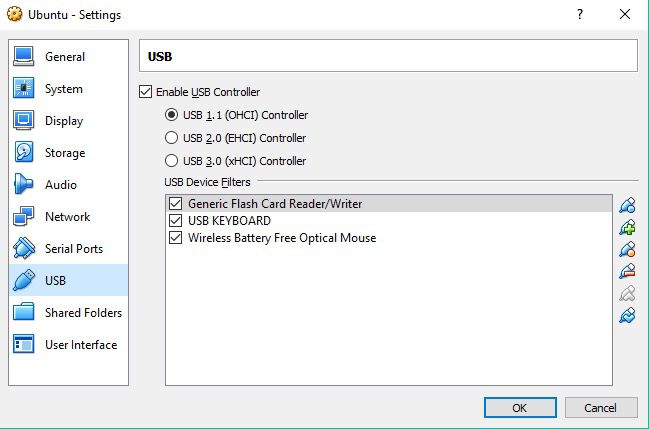
As VirtualBox enables USB connection, the shared USB device will appear in your guest OS. The virtual machine will recognize the USB device and you’ll be able to get full access to device’s functionality from your guest OS. This way, you will be able to connect USB to VirtualBox remotely.
One thing you should remember is that only one machine can access a USB device at a time.
Considering that many virtualization apps offer limited or no support for local USB devices, the software solution, USB Network Gate, seems to be a real sigh of relief for many users.

For current VirtualBox USB users, they recognize that their USB-reliant virtual machines must be ‘enabled’ in order to function. While otherwise convenient, VirtualBox USB software elicits frustration because VirtualBox USB support isn’t enabled by default.
Regardless of how much we’d like to connect to USB in VirtualBox (or updated versions) right off the bat, developers haven’t created a USB functionality that works at the moment.
However, VirtualBox USB support is NOT an impossibility- or even that difficult to enable in the first place. That being said, we’ll show you exactly how to connect to USB in VirtualBox for Mac and how to open a VirtualBox USB Linux.
VirtualBox offers remote display of a virtual machine. That means, started on one computer, a guest OS can be displayed on another PC and controlled from there too. To do this, VirtualBox uses VRDP, VirtualBox Remote Display Protocol, which is backwards compatible with Microsoft’s RDP protocol. The VRDP support makes VirtualBox an optimal solution for those who want to access their virtual machine over RDP Connection.
What about VirtualBox remote USB access? Well, displayed on a remote computer as VRDP data, VirtualBox guest OS is able to access USB devices of that remote computer in the same way as local USB peripherals of VM’s real host. VRDP is a simple way to remotely access USB in VirtualBox.You can access USB dongle in VirtualBox or get access to local printer from virtual environment.

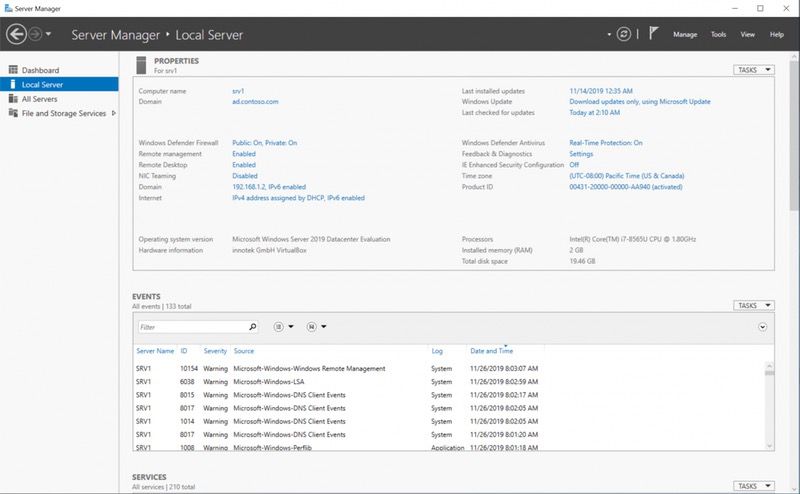
Make sure you enable Remote Desktop in Server Manager before you try to connect to Windows Server without VRDE.
If Server Manager wasn’t open at your log in, open it in the Start menu on Windows Server VM.
Select Local Server and make sure you enabled Remote Desktop on the properties section. Allow remote connections to this computer and click OK.
This section is for Mac users who are using a VirtualBox machine to run Windows.
VirtualBox Mac USB devices can “pass through” a Mac operating system and- instead- function on the virtual machine running Windows OS.
Follow the steps below to bypass Mac OS X and access a USB plugged into a USB port in your WINDOWS “Virtual Machine”.
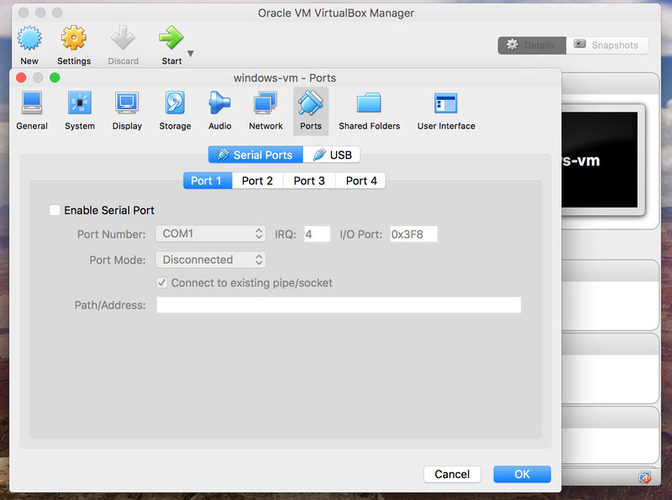
Note: choose the USB 2.0, as it is much faster than using the USB 1.1 option.
Quick Explanation: we’re now specifying the selected USB device to pass through to Windows VM(Virtual Machine) on this screen. Once established, as long as the Windows VM is running, the USB device will function on Windows VM whenever the USB device is plugged in.
If the VM is closed when the USB is plugged in, it will function on the normal Mac OS X.
 In the above screenshot, you can see that the USB controller was moved to USB 3.0. Go ahead and ignore that because USB 3.0 does not currently work on Windows 7 VMs.
(If this is your first time selecting “USB 2.0”, you’ll most likely see the screen shown above, so don’t be alarmed.)
From here, you can freely connect your USB device to your Mac, and it will behave as if physically plugged into a Windows computer.
Not too bad, right?
Note: when you look in the Mac OS X “Finder”, you won’t see the USB device anymore. However, if you close the virtual machine and reinsert the USB device, it will appear as normal on your Mac OS X.
If you’re a Linux user, then your VirtualBox USB support set-up will be a bit different. So, if you’ve ever wondered how to access USB on VirtualBox Ubuntu, we’ll show you exactly how to open a USB on Ubuntu VirtualBox below.
Note (1): By default, VirtualBox only supports .x1 USB devices. The VirtualBox Extension Pack includes USB 2.0 and USB 3.0 support, as well as intel cards for VirtualBox RDP and PXE boot.
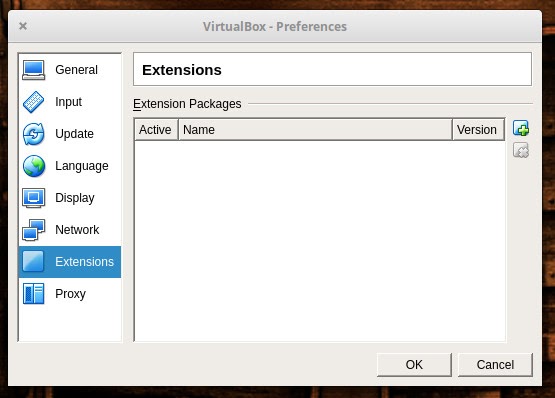
Note (2): You MUST install the VirtualBox Extension Pack On The SAME VERSION of your currently installed VirtualBox.
 And navigate as follows:
Note: By checking the description, you’ll see the features and functions added to your VM
Your user must appear in the “vboxuser” group in order for VirtualBox to “see” your USB devices.
“sudo gpasswd -a yourusername vboxusers”“groups yourusername”Note: Choose either USB 2.0 Controller or USB 3.0 Controller (FYI: only one controller type can be enabled
“virtualbox add new usb filter”
“virtualbox add <new> usb filter”
Run your Virtual Machine to see your USB devices in the “Guest” OS. Don’t forget that host Operating systems can’t see a USB device if VirtualBox is using it.
How To Unmount USB Devices From Guest Operating Systems.
Note: If you want to mount the USB in VirtualBox again, just go to your “Devices” list and reselect the USB device.
As you can see, enabling VirtualBox USB support can be accomplished in just a few easy steps. From VirtualBox mac USB support to how to access USB on VirtualBox ubuntu (Linux), your preferred USB devices will always be within reach.
UNG for Windows
UNG for Mac
UNG for Linux
UNG for Android