Submit your email address to get a link for quick download on your desktop and get started!

The most widespread way of physically connecting modern devices to your computer is via USB ports. Of course, there is plenty of other communication interfaces still used nowadays but, let’s be honest, whether you have a mouse, a printer, a scanner, or any other peripheral attached to your home PC, there is a good chance that they all communicate with your machine via USB connection.
Common problem: For example, you might need to share a USB scanner connected to your desktop with your colleagues’ laptops. Even if the computers are in proximity to each other, it is not always feasible to physically insert and re-insert the device into their USB ports, leaving alone computers located at a distance. This article will answer the long-lasting question "How do you share a scanner on the network?".
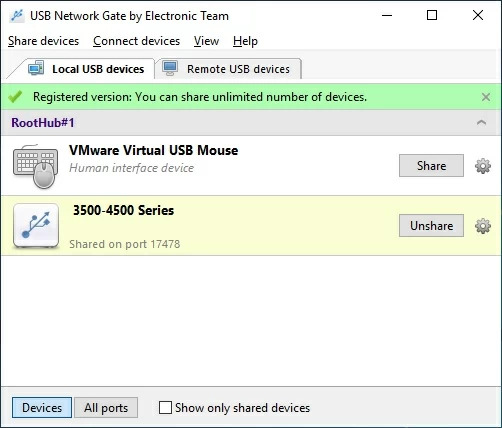
USB Network Gate supports multiple platforms and can share scanners on Windows, macOS, Linux, Android, and Raspberry operating systems. For this article, we will mostly concentrate on the Windows part of the app.

USB Network Gate benefits:
When users connect a scanner to Windows 10 device or add it to a home network, they usually can begin scanning documents and pictures immediately.
But for those scanners that do not install automatically, we’ve provided the following instructions to explain how to add scanners to computers running Windows 10:
In the majority of cases, these are the only steps required to set up a local scanner or discover a network scanner. If this process doesn’t work, here’s what you’ll need to do further.

Note: If the scanner is part of a multifunction or All-In-One printer, users might only find the name of the printer. To find the scanner, select the installed printer under Printers & scanners, click Manage, and finally select the scanner.
If your scanner isn't displayed, choose The printer that I want isn't listed, and proceed by following the instructions explaining how to add it manually.Note:
- To allow Windows 10 to locate and install the scanner, ensure the computer and scanner are connected to the same network.
- Users may also find it necessary to get the administrator permissions that allow for the installation of some scanners.

Regarding the process of adding a scanner to Windows 11, it’s quite similar to the ones we showed for Windows 10 steps above. However, there are a few differences that need to be taken into account.
When users connect a scanner with their computer, Windows 11 should automatically install and configure the scanner drivers so users can begin scanning their documents and pictures immediately.
If Windows 11 fails to automatically install and set up the scanner, the steps below explain how to add scanner drivers manually:


If the scanner is not displayed on the device list, users must add the driver manually. Choose the Add manually option, then proceed by following the instructions provided.

Users should be able to locate a wireless or network printer after following the installation wizard below.

If the desired wireless scanner wasn’t added to the home network, we recommend reviewing the manual that came with the scanner to find information on how to set up your particular device in Windows 11.
It’s a pleasantly straightforward process to scan documents onto Mac computers. However, before connecting a scanner to Mac, one must ensure the scanning software on their macOS computer is up-to-date.
For those using multifunction AirPrint printers and scanners, feel free to skip checking for software updates.
Follow the steps below to learn how to install a scanner on Mac:
Note: Do not install the software that comes with the scanner. The macOS computer will download the latest scanner software automatically.


If the scanner still does not appear on the list, refer to the documentation provided with the scanner to find guidance on how to add a scanner to Mac.
Just as with Macs, scanning documents and images onto Linux computers is usually a simple and fast process. Conveniently, Linux has numerous packages for scanning to choose from.
The most popular package is called SANE, and so we’ll show how to use it to add a scanner in Linux on the example of Ubuntu.
SANE (Scanner Access Now Easy) is open-source software enabling scanning on most Linux devices. It also enables Linux devices to utilize various image scanning hardware, and the community revolving around SANE offers added support for more scanners regularly.
Here is how to set up scanners on Ubuntu with SANE:
apt-get install sane sane-utils libsane-extras xsaneApplications > Graphics > XSaneFor more detailed instructions regarding manual installation, see the Ubuntu SANE Troubleshooting guide.
UNG for Windows
UNG for Mac
UNG for Linux
UNG for Android